Converting a Word File to Publish to Zendesk
We get a lot of questions about moving documentation from Word or PDF files into an online format. It is often a necessary but somewhat painful process. Here are a few tips that will hopefully help.
In this artilce we will be talking about some tips to move from Word to an online system such as Zendesk. In a later article we will talk about how to move from PDF files to an online system.
Avoid Temptation
First, you are going to be tempted to take some shortcuts. Don't do it. Your documentation will look horrible and your company will look unprofessional.
Here are some things you will be tempted to do:
- Upload your Word files as attachments in your new online documentation system. Your customers will cry if you do this. It means they have to open a Word file every time they want to read a doc. That is so early 2000's.
- Take screenshots of your Word files. Don't. Slap yourself on the wrist for even considering this.
You are going to need to either copy and paste the content over to the new system or find some sort of Word Importer. Most online systems don't import Word files so you may be stuck copying and pasting content.
An example with some tips
Our example document
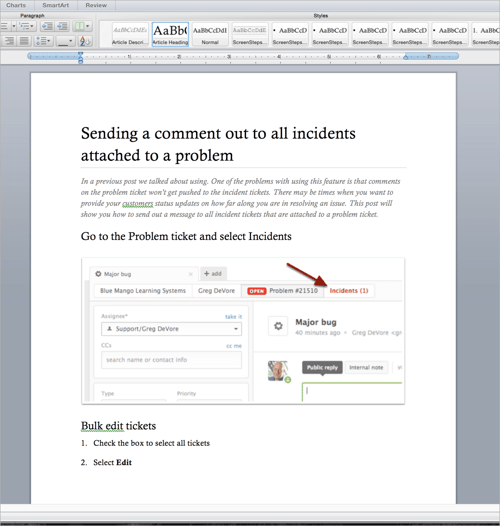
This is the document that we are going to move over to the Zendesk Help Center. It has some basic formatting and an image.
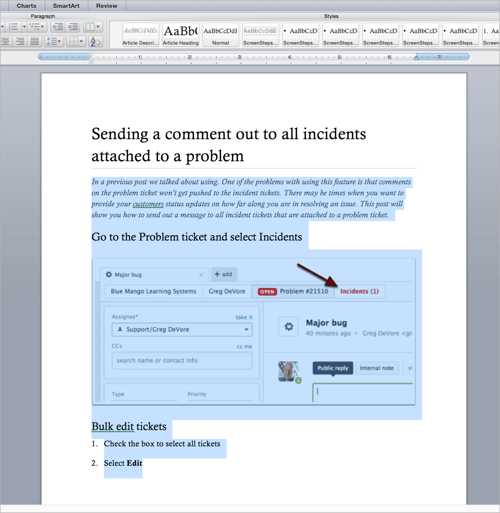
Step 1: Copy all of the content
Step 2: Paste it into the editor
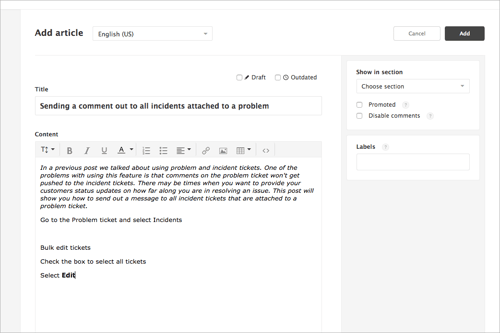
Notice that I moved the title of the document to the Title field and put everythng else in the Content field.
You should notice that a few things are missing:
- No headings
- No lists
- No image
Let's fix it.
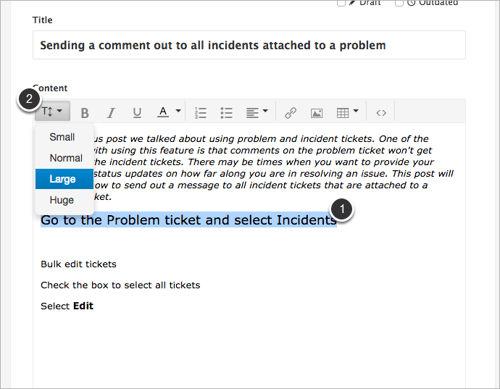
Step 3: Fix your headings
Depending on your online editor this process may be different. In Zendesk you make headings Large or Huge. In other editors you may want to assign a heading as an h2 or h3 tag.
Step 4: Fix your lists
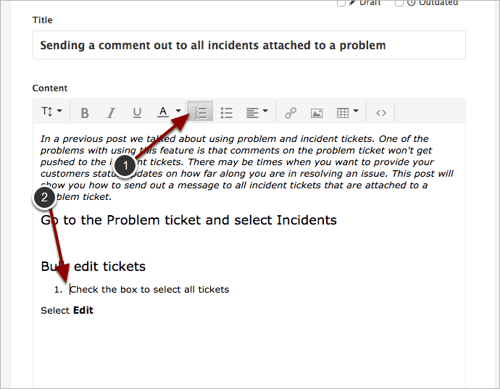
Place your cursor in front of the first list item and select the list button.
Fix additional list items
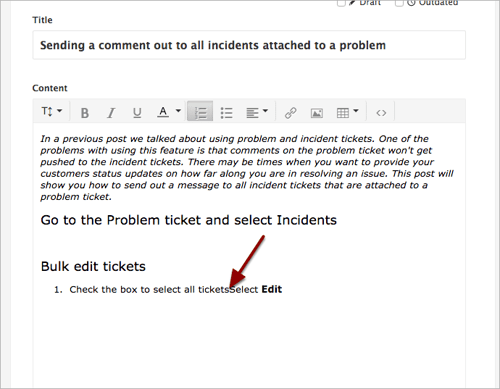
To fix the additional list items you often have to delete whitespace until the list item is on the same line as the previous list item.
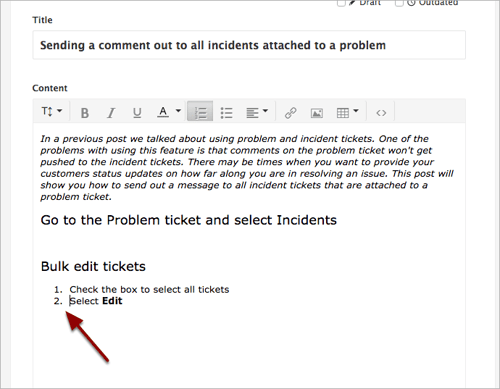
Then hit return and the line will get formatted as a list item.
Step 5: Upload images
This part can really be a pain. You can't copy and paste images from Word (or Pages) into most online editors. You need to somehow save the images as separate image files on your hard drive and then upload them. Here are a couple of techniques that can work:
- Copy the image and then paste it into a new image document in an image application (Preview will work on the Mac). Save the image file and then upload.
- Use a screen capture utility to take a screenshot of just the image in the Word document. Then upload the screenshot to the article.
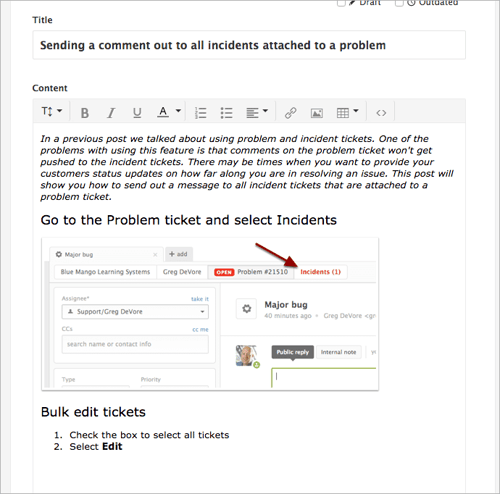
Step 6: Final cleanup
There may be additional items that you need to clean up. If you were using specific colors in your Word files you will need to reapply those.
Important: If you want to change ALL of your font colors to a different default color, use global CSS to change the color. Don't go through your documents and use the font color picker to change the default font color. Only use the onlie font color picker to highlight certain text strings, for example to make some text red.
It's hard, but it's worth it
Moving your Word files to the web will take some time. But in the long run it will be worth it. It will be much easier to keep your documentation up to date and much easier for your customers to find and use your documentation.


