Zendesk has always given you a lot of options for customizing your knowledge base site. In the old version of the Zendesk knowledge base this was done by adding "Extensions". These extensions could be javascript widgets, html snippets, CSS widgets, or integrations with other applications.
One of the main advantages of these widgets was determining who got to see the widgets. For example, if you wanted to add some javascript that would only get triggered for agents on your account then you would create a javascript widget and set the display option to "Agents only".
In the Zendesk Help Center, however, things have changed. There are no longer extensions or widgets. Instead you have complete control over the HTML, CSS and javascript for your help site.
This flexibility is great, but it makes adding conditional content, CSS or javascript a bit more complicated. You no longer have the option of adding widgets that only display for certain types of users.
The solution is to use javascript. In the Help Center there is a new javascript object called HelpCenter. The HelpCenter object contains information about the current user. You can use this information to change the way your Help Center displays to different users.
For example, we created a recent blog post that shows how to use the HelpCenter object to display "quick navigation links" to agents and managers. You can see full article here:
Zendesk Help Center Javascript Tricks
We use this technique to build out a feature that lets ScreenSteps users open ScreenSteps from within Zendesk.
To learn more about what you can do with the HelpCenter object, it is good to experiment in your javascript console. I will show you how to do this in the Chrome browser, but most other browsers will let you do something similar.
Trying it out
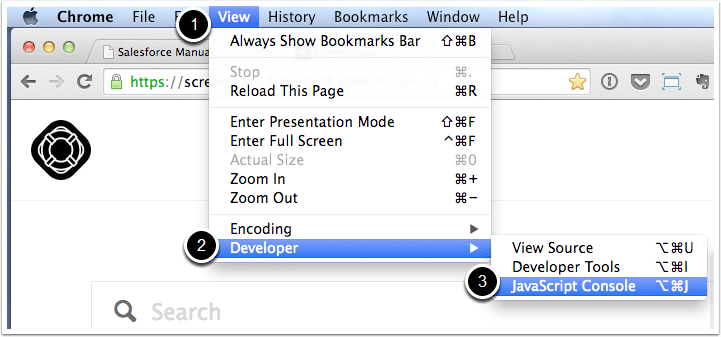
Go to your Help Center in Chrome and select View > Developer > JavaScript Console.
Type HelpCenter in the console (1). You will see the object displayed below (2).
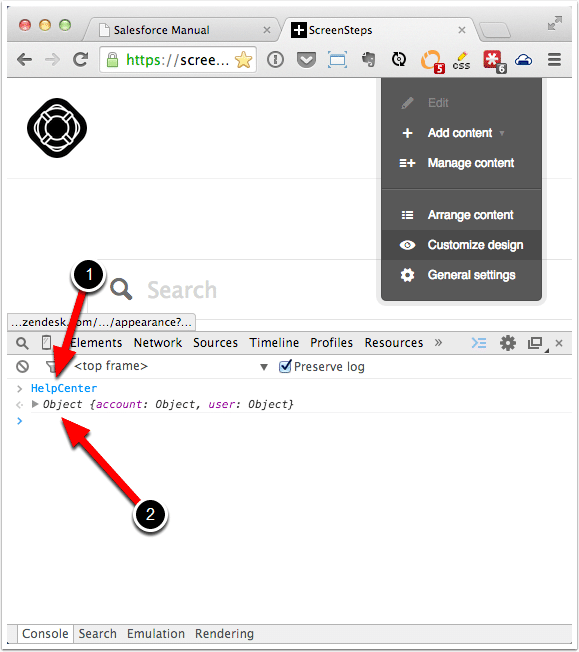
Expand the object by clicking on the arrows to the left. This will let you see the values for different attributes of the object.
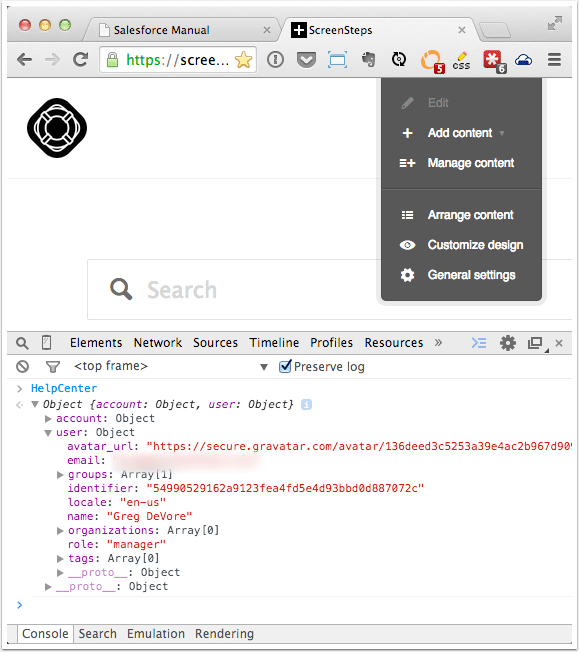
The most useful attribute is the user attribute. It lists the role, groups, tags, and organizations for a user. By using javascript we can then set up conditional logic based on any of these values. For example, the following code would show an alert dialog to all managers:
if (HelpCenter.user.role == "manager") { alert("hi manager"); }
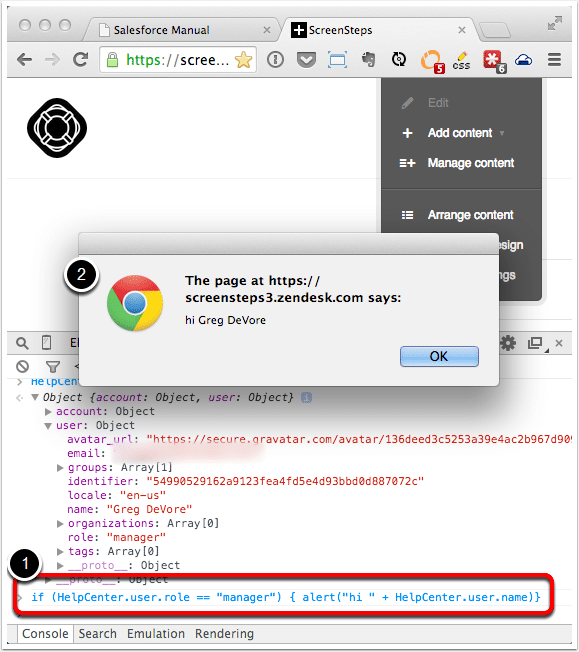
Or we could even get more tricky and display their name.
if (HelpCenter.user.role == "manager") { alert("hi " + HelpCenter.user.name)}
This would display their name.
It gets more useful when you add in jQuery. You can use conditions to display or hide certain information based on the current user. See our Zendesk Help Center Javascript Tricks article for an example of showing/hiding content based on the user role.
Hopefully that gives you some ideas about how you can use javascript in Help Center to customize your site.