![8 Ways to Add Annotations to Your Screenshots in ScreenSteps [Video]](http://play.vidyard.com/XjVfecNLrP9xhT4snwc1Ca.jpg)

.png "Jonathan DeVore")
Having screenshots in your help guides can be helpful, but sometimes screenshots aren't enough. It can be confusing for your employees to figure out why the screenshot is there.
That's where annotations come in. Annotations help emphasize the important parts of a screenshot. And I've seen annotations be a game-changer for content creators in multiple companies.
The ScreenSteps online knowledge base comes with an editor so that you can create step-by-step instructions. With the editor, you can add screenshots and annotations using a built-in snippet tool.
Watch the video to see how you can add annotations to your screenshots in the ScreenSteps desktop editor and scroll through the 8 different options you have for annotating those screenshots below.
And make sure to check out this video to see how ScreenSteps makes it fast and easy to add screenshots using the built-in snippet tool.
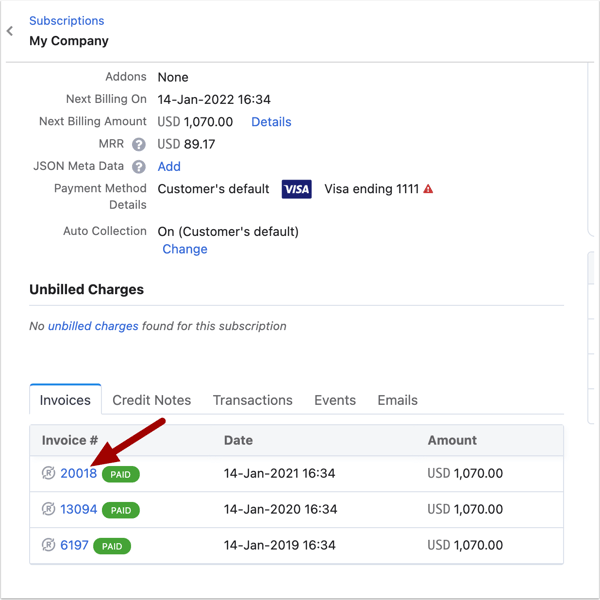
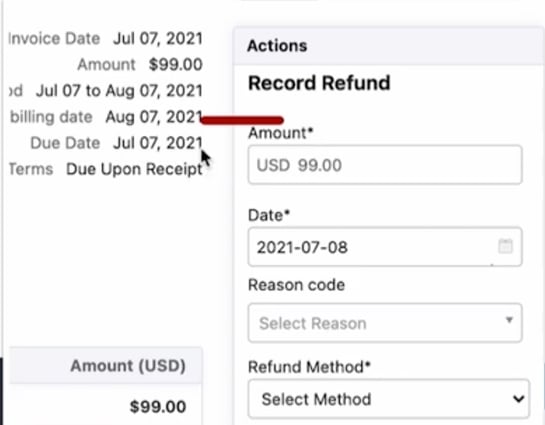
1. Add an arrow
The most basic annotation is adding an arrow that points to the important information in the screenshot. This shows the readers exactly where to click.
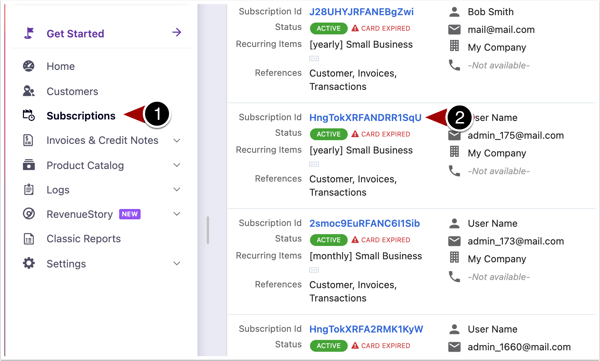
2. Add a sequence of arrows
If there are multiple steps (or clicks ) on the same screenshot, then you can add multiple arrows. With multiple arrows, you can add a sequence of numbers so readers know the order of where to click.
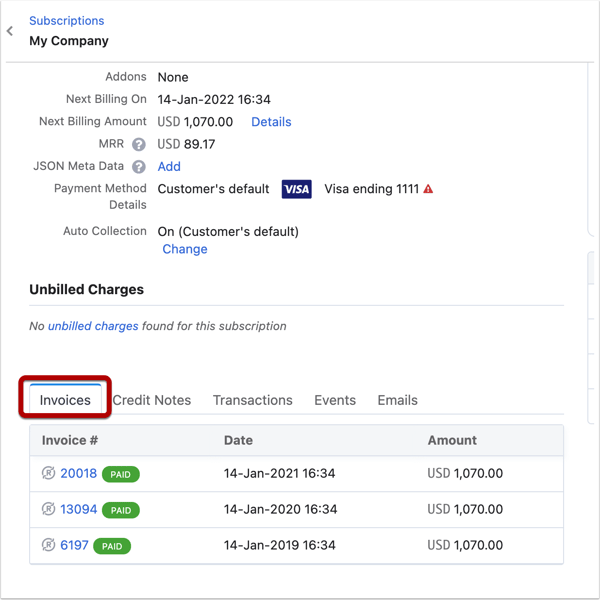
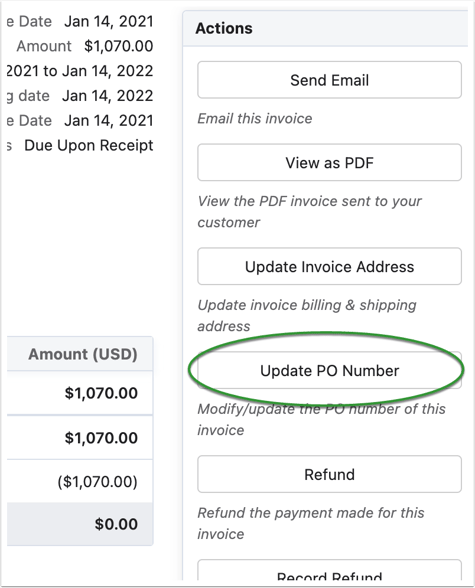
3. Draw a square
When you draw a square around text or a button on the screen, then the reader knows where they need to click.
4. Draw a circle
Have something important that you don't want the reader to miss? Draw a circle around the area you need readers to pay attention to.
5. Highlight important areas
Another way to emphasize an area that the reader absolutely cannot miss is to add highlights. The highlight show the areas the reader needs to pay attention to.
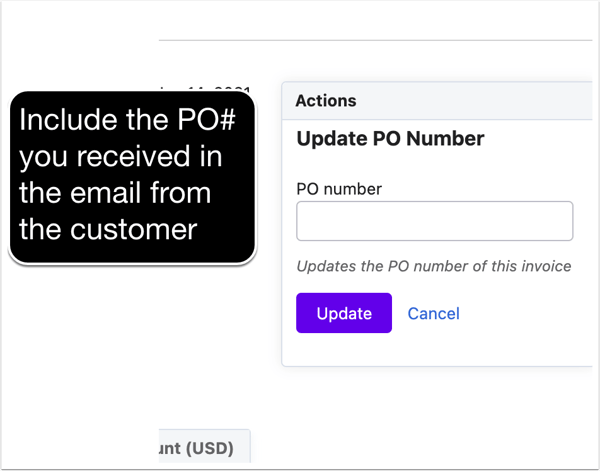
6. Add text on the image
When you add text right on an image, it is easy for the reader to connect which instructions go with an image.
7. Blur out sensitive information
When you create examples, you often have to use private accounts. Blur out sensitive information. This way, you can use examples that relate exactly to what your employees are doing without disrupting privacy.
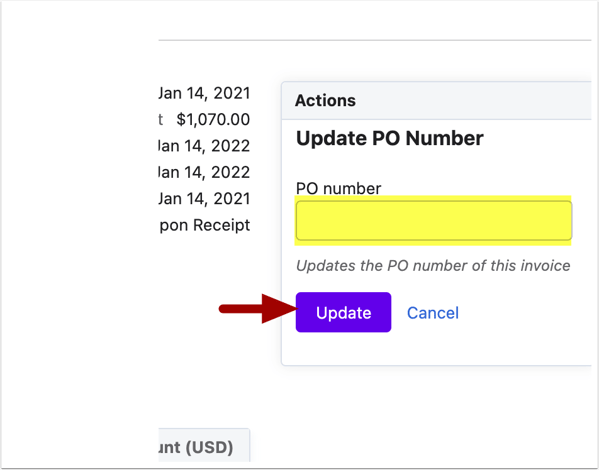
8. Modify the arrow annotation
Modify the arrow annotation so that it is just a line and doesn't include the arrow point at the end of it.
You can also modify the formatting of these annotations like changing their colors, add drop shadows, etc. You can also create presets so your entire team has access to the same annotations as you.
When you're done, your article is ready to publish to the knowledge base, copy and paste into a Word document or Email, or to download as a PDF.
Are you taking advantage of all of ScreenSteps' features?
When you use the screenshot annotations tools in ScreenSteps, you are able to document your procedures faster. ScreenSteps has multiple content creation tools to help speed up the content creation process.
ScreenSteps was designed to simplify the process for creating, storing, and sharing documentation in companies.
Are you taking advantage of all the ScreenSteps' features?
If you are already a ScreenSteps user, here are 9 features you should be using to get the most out of ScreenSteps.
