How to Make a Flowchart For Your Call Center Agents (5 Best Practices)
When your call center agents are on the phone, they are pressed for time. They have someone on the other end of the line who expects them to have all the answers. And that puts a lot of pressure on your agents.
The thing is your call center reps aren’t going to remember every procedure they need to complete to help callers. That’s why it is important to provide them with documented procedures — like flowcharts — to help guide the way.
While there are many different ways to document your standard operating procedures (SOPs), in this blog post we are going to go over how to make a flowchart.
After eight years of helping companies document procedures in ScreenSteps — a knowledge base software — I’ve seen a lot of different approaches to writing procedures. I’ve used those observations and experiences to provide five best practices for writing flowcharts.
First, I’ll explain what a flowchart is. Then I’ll provide five best practices that will help you make a clear and complete flowchart that your agents can use to help them on calls.
What is a flowchart?
A flowchart, or what some call a process map, is typically used to help you design a new process or visually diagram an existing process. It is a standard operating procedure (SOP) that shows end-users how to do a task. It is a form of a call flow or a procedural guide.
A flowchart is like a treasure map for your procedure. Only instead of “X” marks the spot or a hint leads you to your next clue, there are shapes and arrows to guide your agents to the next step on a call.
A flowchart is just one approach to documenting your SOPs. Other approaches include step-by-step procedures, workflow articles, checklists, and more.
While we don’t typically recommend it, a flowchart can also be a great tool to help call center agents navigate through a difficult process or troubleshooting procedure. Just be aware that not all reps like going through a flowchart.
5 best practices for how to make a flowchart
If you’re going to create a flowchart of a process, procedure, or call flow, here are five general guidelines.
1. Use shapes to communicate different parts of a flowchart
Use shapes appropriately, meaning use shapes that communicate different steps in a procedure. Don’t get too bogged down by which shape you should use.
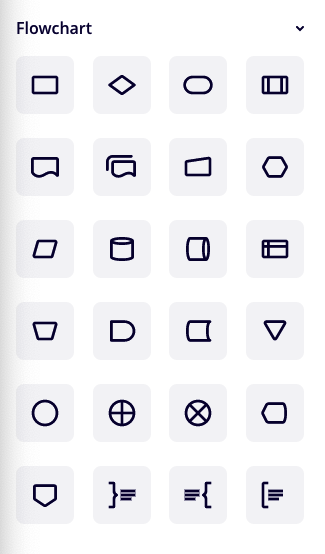
Flowcharts/process maps can include dozens of different shapes and they all mean various things. Here are shapes from Miro, a virtual whiteboard, for creating a flowchart.

There are 24 different options in the above example. If you use 24 different shapes to write your flowcharts, it’s going to be confusing for your end-users reading your flowcharts.
When you know which shape you are going to use for each action/instruction in your flowchart, it makes it easier for you to write as well as easier for your agents to read the flowchart while they are on a call.
It’s like a math equation — you know what the order of operations is so it makes solving the problem easier. (Just a little throwback to PEMDAS for you.)
Which shapes to use in your flowchart
If you’re creating a flowchart for your reps, don’t worry so much about all of these details. Just use these three basic shapes and one symbol:
Egg-shaped oval
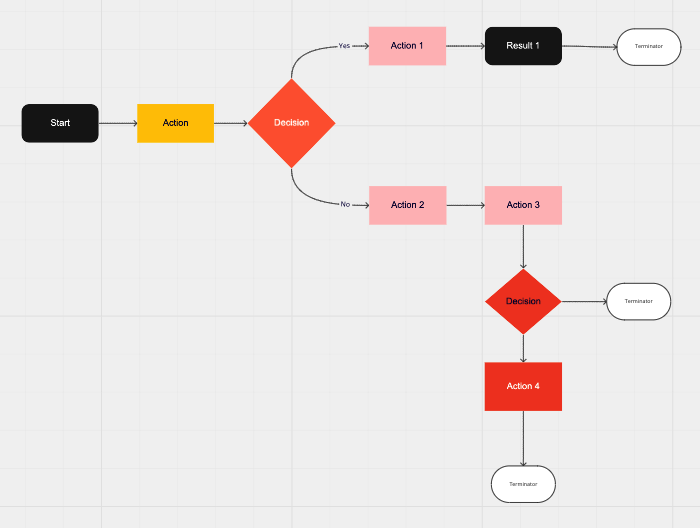
Use the egg-shaped oval to indicate the start/end of a process.
 Square
Use a square to indicate tasks/procedures that need to be completed.
 Diamond
Use a diamond to signal that a decision needs to be made. That means the person going through the flow will need to choose which path to take by answering the question in the diamond shape.
Curly bracket
At any point in your flowchart, indicate further instructions or additional notes for what to say or do by using a curly bracket next to the step.
2. Create flowcharts from left-to-right, top-to-bottom
When you design your flowchart, you want to lay it out in the same way that you read a book in English.
Start in the top left corner and build your flowchart out to the right. Just remember, create your flowchart from left-to-right and top-to-bottom.

3. Build a narrative
Like all good stories, a flowchart has a beginning and an end. To be more accurate, a flowchart is more like a choose-your-own-adventure book in that it can have many outcomes or endings.
Before you start creating your flowchart, it may help to first build a narrative.
First, talk through the process with two co-workers. Choose co-workers with different levels of experience. You’ll want to talk to one who is also familiar with the process (an expert) AND one who is NOT familiar with the process.
This allows you to be a “teacher” and have a “student” with somebody to check your facts. You can jot down notes from the expert and try out the steps with the worker who doesn’t know the procedure as well.
Doing this will force you to identify all the nuances of a procedure (aka find all the possible outcomes). It will be easier for you to identify missing steps or outcomes for the procedure you are documenting in your flowchart.
4. Use diamonds when there are ‘if-then’ statements
Quite often, when people are building out a flowchart, they’ll say, “If situation A happens, then the rep needs to do Z.”
The problem is they forget to articulate what happens if situation A DOESN’T happen. That’s why it’s a good idea to use a diamond. It forces them to acknowledge that a decision is being made that can change the outcome (or, at the very least, the next step) of the procedure.
It’s as simple as putting in a diamond with the question:
- Does situation A happen?
- YES
- NO
Keep the “if-then” questions fairly high level and specific.
How to address complex procedures
Sometimes sub-processes must be completed as part of the overall process. Create other flowcharts for those other processes.
If your program can link to those other flowcharts, then create a hyperlink. Otherwise, indicate with a note how to get to the sub-process.
Also, you can’t capture click-by-click instructions in a flowchart. Flowcharts are good for a high-level overview or simple procedures.
For more complex procedures, you’ll need to document those in another application like Word or a knowledge base so that you can add details.
5. Test it out and make updates often
Once you’ve finished writing and designing your flowchart, your work isn’t done. You’ll want to test out your flowchart to make sure it accurately reflects the procedure and covers all of the outcomes.
Listen to 10 calls or watch an agent work through a procedure where end-users use your flowchart. Confirm that the flowchart addresses all those situations perfectly.
If it doesn’t, make some updates!
Alternatives to flowcharts: Other ways to clearly communicate SOPs
Flowcharts are a good way to visually walk your agents through a procedure. It provides a high-level overview of what steps an end-user needs to take to complete a task.
However, where flowcharts fall short is in complex procedures. There are many different ways to write your SOPs.
ScreenSteps is a knowledge base software company that makes it easy for businesses to clearly document their procedures by using interactive workflow articles, step-by-step guides, and checklists. It is fast for content authors to create articles and easy for end-users to find and follow procedures.
So, what are alternative SOP options to flowcharts?
In this article, we provide four examples of different SOPs that can work with or replace your flowcharts in your business.

.png)


